We are the MozFace team. A blog photo is public the moment you hit publish, and unlike a fleeting social post it tends to stay up and rank in search for a long time. That makes the background worth a careful look: a stranger walking past, a shop sign with an address, a receipt on the table. This article covers what to check in a blog photo, how to hide faces and personal info reliably, and a short pre-publish checklist — with the reminder that what is appropriate to publish is always your own call.
What to look for in a blog photo
The most common things to catch are people in the background who did not agree to appear, text that reveals a location like a sign, a menu with an address, or a parcel label, and small personal details such as a name tag or a screen showing private data. Because a blog post stays online and is easy to find, these are easier to overlook and longer-lived than on a quick story.
A phone's built-in editor can crop or scribble over things, but cropping spoils the composition you chose for the article, and a hand-drawn fill can leave a gap or thin out into something still readable. For something you publish, you want a cover that holds up.
Auto-detect background faces
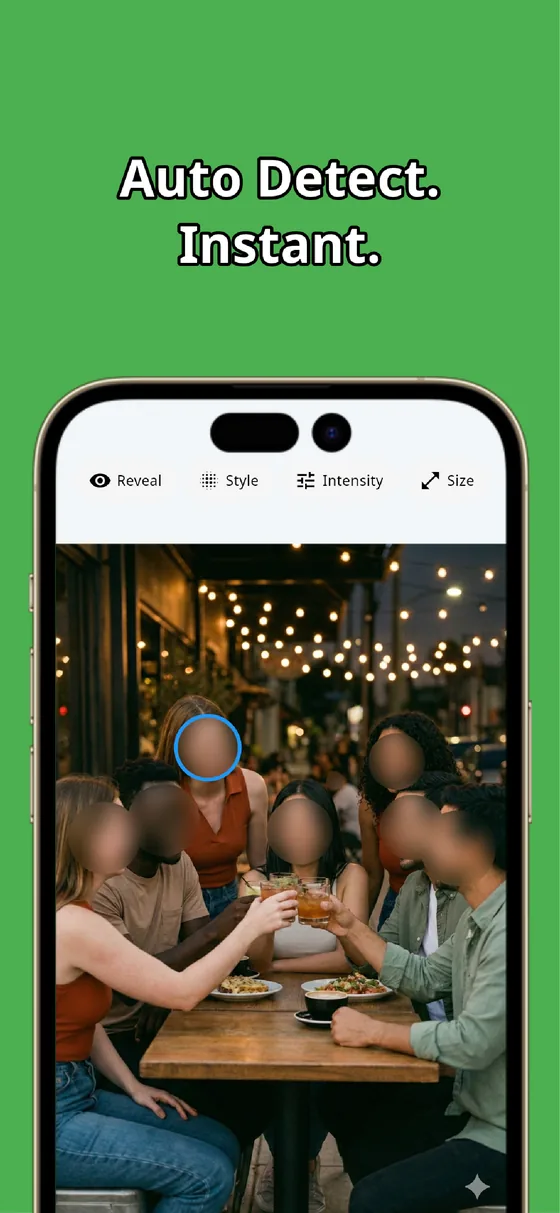
The moment you pick a photo, MozFace runs on-device AI that detects every face and opens with everyone already blurred. A passerby in the far corner is covered along with the rest, so the classic missed-someone-in-the-back mistake does not happen. If a face that belongs in the shot — yours, or someone who agreed — is covered, a single tap reveals it.
All processing stays on the device, and your photos are never sent anywhere. Because hiding is the starting state, the job becomes choosing what to show, not remembering to hide.
Cover signs and personal info, then run a quick check
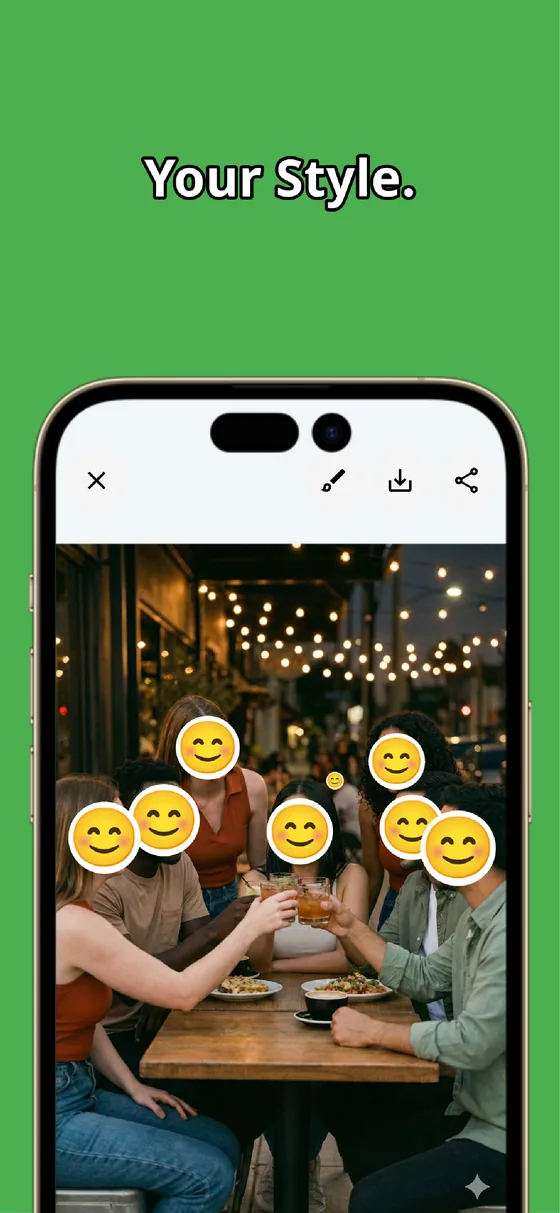
Personal info that is not a face — a sign with an address, a label, a screen — gets hidden with the manual brush you trace with your finger. Choose mosaic, blur, or a stamp, adjust the strength, and cover the text until it is unreadable. Change the brush size and it fits a wide sign or a thin line alike. The finished image saves as a separate file, so your original stays untouched.
Before you publish, a quick pass helps: scan the four corners and the background, check any text and screens, and confirm no one identifiable is shown without their okay. What is appropriate to publish is your decision — this just makes the careful version easy.
For blog photos: auto-detect the background faces, cover signs and personal info with the manual brush, and run a quick check before publishing. Because a post stays online for a long time, that extra minute is worth it — and the final judgment on what to show is always yours.

MozFace
Auto-blur every background face just by picking a photo. Cover signs and personal info with the manual brush. Everything runs on your device, fully offline.
Learn more about MozFaceFrequently asked questions
What should I check in a blog photo before publishing?
Background people who did not agree to appear, text that reveals a location like a sign or label, and small details such as name tags or screens. Scan the four corners and any text, since a blog post stays online and is easy to find. What is appropriate to publish is your call.
Can I hide only the background and keep my subject clear?
Yes. Unlike cropping, you do not cut the composition. Background faces are blurred automatically, and you can reveal the subject you want to show with a single tap.
How do I cover a sign or a screen with text?
Trace it with the manual brush, choose mosaic or blur, and raise the strength until the text is unreadable. The brush size adjusts for a wide sign or a thin line of text.
Are my photos ever sent over the internet?
In MozFace, face detection and editing happen entirely on your device, and your photos are never sent to any external server. It works even with no signal.